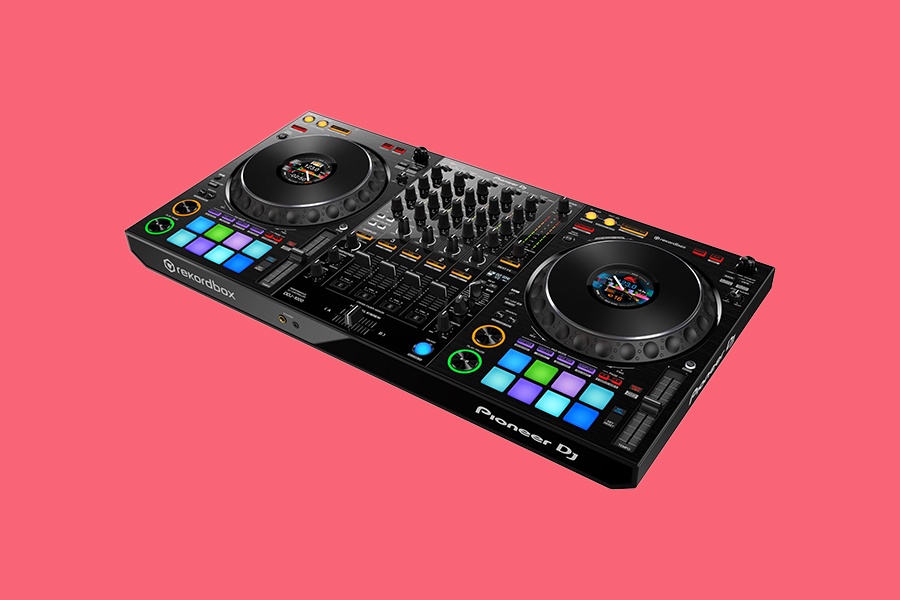
In this post we check out the Pioneer DJ DDJ-1000 and find out why it’s one of the best DJ controllers I’ve ever used!
A few weeks back I decided it was time for a new DJ controller. I’ve always been a big fan of Pioneer hardware, but I was yet to try Pioneer’s own Rekordbox DJ software. Knowing that the Pioneer DDJ-1000 was a Rekordbox only controller made me nervous. I’ve read stories of lagging and bugs in the software, but after much research I decided to take the plunge.
| IMAGE | PRODUCT | Pros | Cons | |
|---|---|---|---|---|
 |
Pioneer DDJ-1000
|
Simple plug and play with easy set up. Widely regarded as the best DJ controller on the market. Works with Rekordbox and Serato. | Hard to adjust the crossfader curve. Expensive. | Check Price |
So over the last month I’ve been testing the Pioneer DDJ-1000 and the Rekordbox software. Below you can find my review of the controller and what I’ve experienced.
Unboxing
Upon unboxing the DDJ-1000 I found the controller well packed inside two boxes. There was polystyrene inside to protect the controller in transit, and a bag full of accessories.
In the bag was a power adaptor, a USB cable, a 2 pin and 3 pin power lead, and a user manual. There was also a license key for a free copy of Rekordbox DJ.
Setting up the Pioneer DDJ-1000
So the first thing I did was fire up the laptop to download the software from the Pioneer website. This was an easy process that took about 20 minutes to complete, including registering, and downloading etc.
The Pioneer DDJ-1000 is a simple plug and play controller so all I had to do is connect it straight to my laptop’s USB port. Rekordbox recognised it and immediately updated because a bug had been found in the beatgrid function. The update that the controller needed to fix this was very simple to install and took just a couple of minutes to complete.
I hooked up a pair of Behringer B210D Eurolive speakers and imported my music collection.
So the first thing you have to do is configure the audio output and sound card in the preferences tab. This is pretty self explanatory, but if you have problems just try each option until you get sound from the correct output. If you’re using the controller outputs you’ll also have to disable the PC master out. This can be found at the top right of the interface and can be disabled with a simple click. If you don’t disable it your computer speakers will also output sound which plays slightly out of sync with the master out and headphones.
Next I configured the crossfader as I discovered there was no crossfader curve adjust knob on the interface. Pioneer have decided that it’s OK to click through four tabs and adjust it by hand every time, which is very annoying! I opened the mixer panel and assigned the crossfader to decks one and two and I was ready to mix.
The Pioneer DDJ-1000 features – Deck section
The first things you’ll use are the browse knobs to load your tracks, you can scroll and select tracks by pressing the knob. You can switch between your list of tracks and music folders by simply pressing the back button below. I should note that all of the knobs and buttons feel of a very high quality. All of the knobs over on the mixer section are also coated with rubber, apart from the filter knobs and FX switches. This gives your fingers a good grip when quickly turning knobs whilst EQing etc.

To the left of the library browse knob there is a slip button. This keeps a track playing at the original rhythm in the background whilst looping, scratching, and using hot cues etc. I find this a really cool feature to use whilst scratching a tracks vocals mid mix. The mix stays perfectly beatmatched as if you’d never touched the jog wheel.
There’s also a quantize button to the left for those that like performance mixing. This is great to use for snapping your beat into line when triggering hot cues and loops with the fader open.
Further left you’ll see the standard pioneer loop in and out buttons. These work exactly like any Pioneer CDJ or XDJ stand alone unit. For those that haven’t used CDJ’s, you simply tap the left button to create the loop start point, and tap the right button at the end point. The beat will begin looping, you can then adjust the loop in real time using each button. To exit there is another button to the right, this button can also be used to trigger a quick 4 beat loop.
| IMAGE | PRODUCT | Pros | Cons | |
|---|---|---|---|---|
|
Pioneer DDJ-1000
|
Simple plug and play with easy set up. Widely regarded as the best DJ controller on the market. Works with Rekordbox and Serato. | Hard to adjust the crossfader curve. Expensive. | Check Price |
Below this is another super handy function inherited from the NXS2 CDJ’s, called the slip reverse. Once activated the slip mode automatically kicks in whenever a track is put into reverse. I tested this out with a few tracks, and was able to easily block out curse words by reversing for the length of the word.
As soon as you put the track back into forward mode the track jumps back to where it would have been, just like the normal slip mode. This could be handy if you’re DJing a kids party and somebody requests a track, of which you only have the explicit version.
Moving on down you’ll see the deck select buttons. These are used for switching between control of up to four decks in the Rekordbox software. This is handy even if you don’t mix with four decks, I like to leave some scratch samples on deck 3 and 4. Therefore I can scratch whenever I like with a simple touch of a button.
Pioneer DDJ-1000 Jog Wheels
Next up is one of the deck sections main attractions for myself, the jog wheels. These are the same size as the CDJ 2000 NXS2 jog wheels and they feel exactly the same. They also work the same, from pressure, rather than the usual touch capacitive jogs seen on most controllers. This means you actually have to push down on them to get the track to stop playing, or to scratch. Although this sounds simple enough, it will take a little getting used to if you’re coming from touch sensitive jogs.
The size of these Jog wheels are something you don’t normally see on controllers of this size. It was definitely a selling point for myself and will certainly attract scratch DJ’s and even loyal CDJ users. I don’t normally scratch on CDJ’s or controllers as I love the feel of vinyl, but I have quickly gotten used to the Pioneer DDJ-1000. I can see many more hours of scratching fun ahead.
You can adjust the weight or resistance of the jog wheels using the jog adjust knob to the right. This lets you adjust between a super free and easy feel when scratching or doing spin backs, or a heavier and much tighter feel.
I’ve always set mine in the centre ever since using CDJ-1000’s many years back, and the centre point on the DDJ-1000 feels exactly the same.
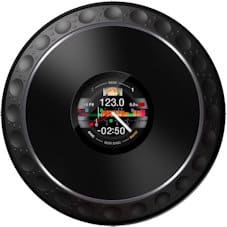
The Pioneer DDJ-1000 gets one up on the CDJ 2000 NXS2 with its full color LCD display in the centre of the jogs. This shows you 17 different pieces of information associated with the current track and deck status. It even displays a waveform so you can keep an eye on the track and it’s current position.
This allows you to easily make smart mix decisions on the fly without looking up at your laptop screen. Anything that makes it easier to mix without looking up at your laptop is always a bonus when you’re performance mixing. It also has the usual track and cue position markers just like the CDJ range. The outside edge of the platter also lights up with bright white LEDs which is handy for those dark clubs.
Pioneer DDJ-1000 Performance pads
Down below the jogs you’ll find a set of 8 performance pads per deck. These pads are made from a very firm rubber and feel like they’ll take plenty of abuse without splitting or cracking. They will illuminate when they have been assigned with a function, which can then be activated with a simple touch.
Here you can set up to 16 hot cues by simply stopping the track and pressing the button whilst in hot cue mode. You can also use these pads for triggering effects in pad FX mode. This lets you assign up to 32 effects using Rekordbox, these can be triggered simply by touching the corresponding pad.
There’s also a handy beat jump function that lets you skip large amounts of a track. You can pre-program beat jumps into all 8 pads and chose how many beats to jump, and in what direction. When you trigger a beat jump it doesn’t affect the rhythm of playback so nobody will notice. This is great for jumping long intros, for performance mixing, or for skipping past curse words.
You can drop up to 8 samples onto the sample decks in Rekordbox and trigger them with the performance pads. I find this super easy and it can easily be done mid set in a matter of seconds.
There’s also a really cool keyboard mode that changes the pitch of your hot cues. I found that I could get really creative by using different sounds on cue points that are close together. I press the pads to switch back and forth in time with the beat to really add something unusual to my sets.
Moving on along there’s the beat loop function that simply triggers a loop. The loop will play in the number of beats that you’ve previously assigned to a pad. This makes looping very simple and triggering them couldn’t be easier, simply press a pad to enter and press again to exit.
| IMAGE | PRODUCT | Pros | Cons | |
|---|---|---|---|---|
|
Pioneer DDJ-1000
|
Simple plug and play with easy set up. Widely regarded as the best DJ controller on the market. Works with Rekordbox and Serato. | Hard to adjust the crossfader curve. Expensive. | Check Price |
Lastly, you can use the performance pads to change the key of the track that is playing. When in key shift mode you can select up to 8 musical keys and assign them to the pads. I played about with these changing the key every 2 beats, which gave the track a strange rising and falling feel… This is hard to explain unless you hear it for yourself! But this is a really cool function that you could definitely get super creative with. Over to the right there’s also additional buttons for key shift and key reset.
Next to the performance pads there are also the standard play/pause, cue, search buttons, and shift buttons. And just above these is another feature inherited from the CDJ series, the cue/loop memory button. This is used to quickly store your cue and loops points, these can then be called out using the search buttons in combination with the shift button.
And lastly a nice long pitch slider which can be adjusted using the master tempo button to change the range of variation. So overall the DDJ-1000 has a very feature packed deck section with plenty to keep your crowd guessing. Before we head over to the mixer section lets take a quick look at the terminals around the back…
Pioneer DDJ-1000 terminals
The Pioneer DDJ-1000 has been built with the ability to hook up to large sound systems and has lots of connectivity. The main master out 1 has XLR connections for a balanced output. There’s also an unbalanced output at master 2 where you can connect leads with RCA plugs. I’ve been using master out 1 and I should add that the sound quality of this unit is fantastic.

Next along there is a balanced booth output with RCA plugs for hooking up to monitors in the clubs. This will also appeal to mobile DJ’s that play the larger venues. The booth volume can be controlled separately to the master volume on the mixer.
To the right there’s a ground connection that will be required if you’re hooking up turntables with Rekordbox DVS.
Moving along you’ll find the mixer inputs for adding turntables, CDJ’s, and multi players. You can add up to four players or two turntables to maximize your controller’s abilities.
Right of these you’ll find the USB ports where you can add two different computers/laptops. This is a great feature that all DJ controllers should have, and allows easy back to back DJing. It’s also a great feature for clean and simple DJ changeovers at the clubs.
Something else that will get the mobile DJ’s excited is the two microphone inputs to the right. There’s two 1/4″ jack plug slots and one XLR connection. These are both balanced and have full control on the mixer, which we’ll get to later.
The AC adaptor will also be plugged in on the rear of the controller. Next to the adaptor slot is a cord hook to help prevent the power lead being pulled out during a set. There’s also a push button on/off switch, and on the far left is a Kensington security lock to stop anybody running off with your pride and joy.
On the front of the DDJ-1000 there are two headphone connections, one 1/4″ connection and one 1/8″ connection. This means you’ll no longer have to carry those pesky plug adaptors with you all the time!
The Pioneer DDJ-1000 Mixer Section
The Pioneer DDJ-1000 mixer inherits its design and layout directly from the DJM series. If you’ve been using Pioneer DJM mixers this will be a very simple transition for you.
It offers 4 channels that can be switched between USB A or B for control of two computers. I mentioned earlier that this is great for DJ hand offs, or for playing back to back sets. I’ve played a back to back set using the same feature on a different controller, and it really is so much easier with two USB ports. As controllers progress I can see this being a standard feature in the future.

You can also switch to line on all channels for controlling things like multi players and CDJ’s. Channels 3 and 4 can also be switched to phono for controlling turntables. Perfect for the scratch DJ’s and turntablists that want that traditional feel alongside a modern setup.
Each channel has a 3 band EQ with trims, and nice long and bright VU meters for keeping those levels in check. There’s also cue assign buttons to listen in to the selected channels via your headphones, and a separate one for the master channel.
The channel faders feel very nice, they’re buttery smooth and are nice and tight, just how I like them. The Magvel crossfader was another selling point for me as Pioneer claim it will last for 10 million movements. It runs on magnets and uses contact free technology for a super smooth and responsive action.
I was able to adjust the crossfader to my exact preferred specification using the Rekordbox software. But as I mentioned earlier this is not quick and easy to do mid set. It would also benefit from a quick crossfader curve adjust, as this can only be adjusted in the preferences tab.
This is not ideal for myself, but it’s not a deal beaker. Maybe Pioneer will add this option to the software, or maybe even to the hardware in the future. Up above the crossfader are simple self explanatory crossfader assign switches.
Right in the centre of the mixer is the sound color FX panel, this is really fun to use in the mix. You can chose between a standard high/low pass filter, dub echo, pitch, or noise. I love the standard filters, but dub echo sounds awesome and has quickly become my favourite to use on the DDJ-1000.
There’s a dedicated sampler section where you can adjust the volume of the sampler, and cue it in your headphones. This let’s you find the perfect volume before dropping a sample into the mix. Below this you can fully adjust the cue/master mix of your headphones and their volume.
Back up the top there’s something special for the mobile DJ’s and MC’s out there. A dedicated panel for both microphone outputs that lets you separately control the volumes of each mic, and adjust the EQ. You can also switch them on/off, and use the talk over setting to automatically drop the volume of the music whilst you speak. This is great and will definitely be a selling point for mobile DJ’s.
There’s a master output volume control knob, and master VU meters to get your sound system set up perfectly. And a booth volume knob to control those separate booth monitors we mentioned in the terminals section.
Pioneer DDJ-1000 Beat FX
Last but definitely not least we have the mixer section’s main attraction, the Beat FX panel! This section is something else the DDJ-1000 inherits from the DJM mixer series, and the panel is very similar to that of the DJM-900 NXS2.
The beat FX section will auto detect the BPM of your track and display the figure on the mini screen. If auto mode doesn’t detect the correct BPM you can also tap it in to get perfectly synced FX. These FX can be assigned to all four channels, the microphone, the sampler, or the master channel.
There are 14 available FX and Pioneer have surprised us with four effects that we haven’t seen on a mixer before. These are the Enigma jet, Mobius saw, Mobius triangle, and low cut echo. I’ve really enjoyed trying out these new FX and really like the Mobius FX that will even trigger without a track playing. This effect gives a sound with a feeling of infinite rising for a really cool build up effect.
You can easily turn these FX on/off using the large blue button that flashes so you won’t forget they are active. And you can also fully adjust the intensity of the effect using the level/depth knob.
The Pioneer DDJ-1000 in-use
That just about covers all of the main features of the Pioneer DDJ-1000, but what is it like in the mix? Well, getting the feel for the mixer was really easy, if you’ve used Pioneer mixers before it will feel very familiar. The headphones have more than enough volume, and the separate cue assign buttons are really handy for louder venues.
The master out also has stacks of volume and the sound quality of playback is beautiful and super clear. I haven’t yet tried the booth output but will update this review when I do.
The Magvel crossfader is fantastic when mixing and scratching and I really like the buttery smooth, zero resistance feel. I just wish it had a crossfader curve adjust as part of the rekordbox interface or even on the controller itself. Instead, as mentioned earlier, you have to go through a bunch of tabs in preferences to change it. I like to scratch in most sets so changing the fader quickly is important.
With this setup I’ve found myself using the up faders for mixing and leaving the crossfader in the centre. The crossfader is therefore only used for scratching. A little annoying but something I’ll get used to. Those that don’t scratch can set a normal curve in the software and use the crossfader as normal.
Scratching was really easy to get the hang of with the large jog wheels.. But to be fair, I’ve been using the CDJ 2000 NXS2 which feel exactly the same. There was no lag between the jogs and Rekordbox and playback is precise and clean.
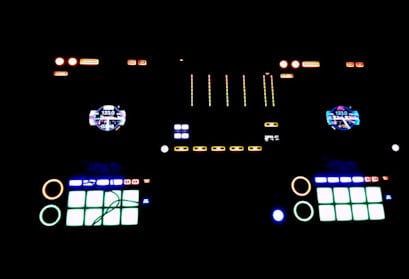
Using the performance pads is really simple, samples and FX are easy to assign using Rekordbox. Hot cues, loops, and beat jumps are easily assigned via the hardware. The pads feel sturdy and I like the fact that you can’t feel any clicking of buttons when you press them. They light up bright and you can easily see what you are doing in the darker clubs. All of the DDJ-1000’s other main functions are also very well lit.
Rekordbox was easy to set up and is really easy to get the hang of. It’s suitable for beginners or pro’s and works perfectly in conjunction with the DDJ-1000. Recording your mixes is done with a simple click and I found the DDJ-1000 recorded with crystal clear playback.
I found DJ changeovers simple by loading up Rekordbox on two laptops and using USB A and B. The second DJ can get his first track cued up and ready to drop, and simply switch to USB B when ready. This also works great with back to back sets using the separate USB switches on each channel for top quality performances.
Should I buy the Pioneer DDJ-1000 controller?
Overall the Pioneer DDJ-1000 offers great value for money, you really are getting a heck of a lot for the price you pay. if this run-trough has ticked most of your boxes I’d definitely recommend it to you.
As with any product you’ll always find some small niggles, things that could be improved, and things you’d like slightly different. But these will vary from person to person depending on your specific needs.
| IMAGE | PRODUCT | Pros | Cons | |
|---|---|---|---|---|
|
Pioneer DDJ-1000
|
Simple plug and play with easy set up. Widely regarded as the best DJ controller on the market. Works with Rekordbox and Serato. | Hard to adjust the crossfader curve. Expensive. | Check Price |
This controller is aimed at performance DJ’s and club/mobile DJ’s that like to add a little something extra to their sets. It’s light enough to transport or carry to the club, and small enough to fit any home setup.

Pioneer DDJ-1000 Pros
- Simple plug and play with easy set-up.
- Free software activation key included.
- Inherits many features from club standard equipment.
- Easy learning curve.
- Lots of connectivity around the back for bigger sound systems.
- great build quality.
- Long lasting Magvel crossfader, great for scratching!
- Light and transportable, great for mobile DJ’s.
- Feature packed controller offering great value.
Pioneer DDJ-1000 Cons
- Only works with Rekordbox DJ, this may put loyal Serato users off. (Update: Pioneer has released a version that works with Serato called the DDJ 1000SRT version!)
- Crossfader curve is adjusted by clicking through four tabs. A simple knob could have been easily added to the controller, or to the Rekordbox interface.
Pioneer DDJ-1000 vs Other DJ Controllers
If you’re looking to compare the Pioneer DDJ-1000 vs other DJ controllers look through some of our guides for DJs for beginners or best DJ controllers overall. The DDJ-1000 has remained our premium pick of the best DJ controllers throughout the years and I don’t see that position changing anytime soon!
Pioneer DDJ-1000: My Thoughts
I always purchase my DJ equipment and gear off Amazon because they offer the most competitive prices, and they are also a very safe site.
| IMAGE | PRODUCT | Pros | Cons | |
|---|---|---|---|---|
|
Pioneer DDJ-1000
|
Simple plug and play with easy set up. Widely regarded as the best DJ controller on the market. Works with Rekordbox and Serato. | Hard to adjust the crossfader curve. Expensive. | Check Price |
Thanks for checking out the Pioneer DDJ-1000 review, testing the controller has been a pleasure. I’m sure this unit will last me many years, any updates will be posted below.
Great review. Every other review out there tells me it has led readouts and full sized jog wheels. It’s nice to hear a bit more about how it works and how it feels. Nice job.
This controller from Pioneer is the dog’s Balearics! It’s also supported from Virtual DJ, and soon to be: djay Pro 2. Trust me; you’ll love it! ??
Great approach and text. Congratulations
Sound quality of ddj 1000 today i sell my old setup cdj 400 and djm 600 and im very disapointed with the sound quality because ddj is very new product snd i expect much more improvement.
Hi, Thank you for this very well detailed review on the Pioneer DDJ-1000 🙂
It helps me a lot.
I have a question: don’t you have CPU problems with Rekordbox DJ and this controller ? Are you using it with a PC ?
You can easily MIDI-map the Crossfader Curve to any less-used knob on the DDJ-1000. Just select the 1000 in Midi Mode, go to the Mixer section, then Add, then select CrossfaderCurve, and then Learn… turn a less-used knob on the DDJ-1000 (such as, I dunno.. Color FX for Channel 4) and boom. There’s your crossfader curve, that you don’t have to go into Preferences for. It works the same on the DDJ-800 (I used the Booth Volume knob).