This post teaches you how to use DJ controllers, stand alone decks, and all-in-one units. We cover all of their functions, what they do, and how to use them.
When you buy your first set of mixing decks you could feel a little overwhelmed by all of the controls. But each one of these knobs and faders has a purpose that you’ll need to understand.
We’ve already covered how to use the mixer in a separate article that you can find > HERE. So today we’ll look at controllers and stand alone mixing decks like multi players, CDJ’s, turntables and all-in-one units.
Our Favorite Controller: Pioneer DJ XDJ-RR
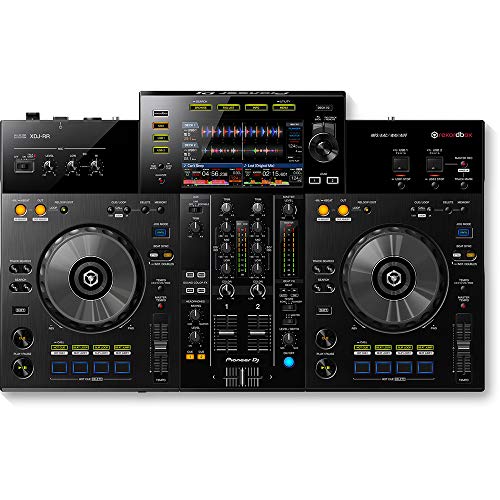
Why We Love It
“The Pioneer XDJ-RR works perfectly with Rekordbox…has some great functions and you can really build a strong mixing foundation with an industry-leading brand among pro DJs.”
How to use a DJ controller
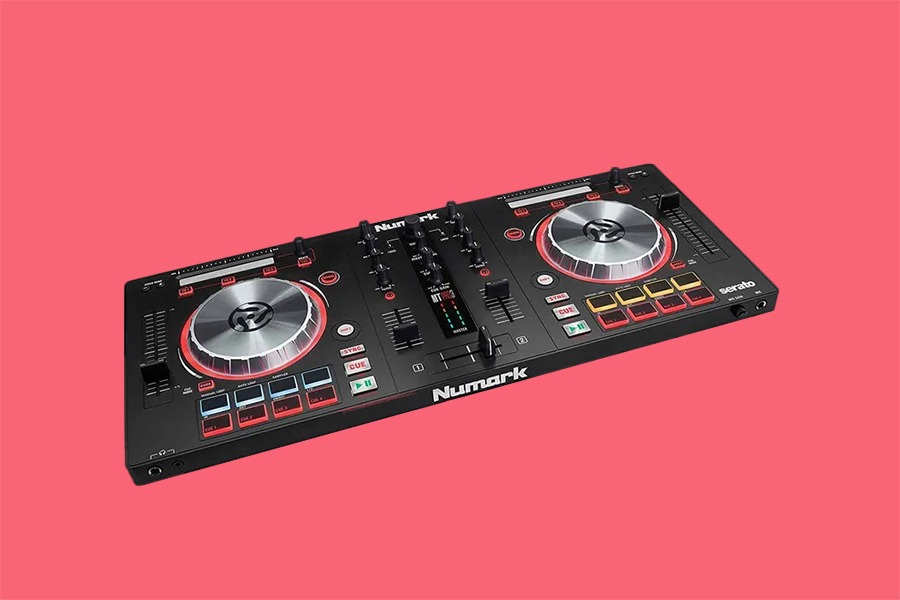
A DJ controller is the most convenient piece of equipment a DJ can own. They offer great value for money, easy transport for working DJ’s, and a lot more features than stand alone decks.
To use a DJ controller you will need a laptop which you will connect to playback your music library. Controllers do not accept CD’s or USB drives, if you need this option you’ll need stand alone mixing decks. We’ll cover stand alone mixing decks and all-in-one units later.
Connecting a DJ controller to speakers and a laptop

The rear of your controller will have multiple sockets for connecting your hardware. The first thing you’ll need to do is connect your active speakers or amplifier, these will be connected to the master outputs. If you’re using RCA plugs be sure to connect white to white and red to red and every socket.
If you’re using separate DJ monitors you’ll connect these to the booth sockets. You’ll control both of the volumes on the mixer section of the controller.
Some controllers will let you plug in extra mixing decks, these will be plugged into the sockets marked ch1, ch2, etc. These separate decks can be assigned using simple switches on the mixer section. Be sure to use channels 1 and 3 for left decks, and channels 2 and 4 for right decks.
Next you can plug in your laptop, this will be connected to the USB socket. If you see two sockets like the picture above, use USB A and assign this socket on the mixer section. USB B will be used for a second laptop during DJ handovers or back to back sessions.
If you don’t see a USB socket this means your controller does not have a built in sound card. You will need to buy a separate sound card to link the two together before you can continue.
Lastly Connect your power lead, but don’t turn the equipment on yet. You must always turn your equipment on in the right order to avoid causing any damage. You can find out what order to use HERE under how to set up DJ decks and equipment.
DJ controllers and their functions
A controller consists of two mixing decks (deck sections), with a mixer in the centre. All of the basic controls on the mixer will work exactly the same as any stand alone mixer.
We’ve already covered mixers in a separate post HERE, so we’ll go straight to the deck sections. All controllers will vary slightly so we’ll just look at the controls found on every deck section.
Your controller will be mapped to work with certain brands of software like Serato, Rekordbox, virtual DJ, etc. Most DJ software will let you simply drag and drop tracks to the deck sections of the interface. So drag a track to deck section one and two of the interface and wait for them to load up.
Deck Select
The deck select button is available on all 4 channel controllers and also on some 2 channel units. Deck 1 and 3 will be controlled by the left side, deck 2 and 4 will be controlled on the right side.
When you press the button you will see the deck which is being controlled highlighted in the software. We’re using deck 1 and 2 so press the deck select button on each deck section until decks 1 and 2 are highlighted.
Library Search
Most controllers have library search functions, these may be on the deck section or the mixer section. As you turn the knob you’ll see tracks being highlighted in the library section of your software. You can then select tracks using this function rather than using the mouse/track pad to drag and drop tracks.
Cue Button/Hot Cues
When your track is loaded you can set a cue point at the point of the track you’d like to begin playing from. You can also set hot cues throughout the track at points that you may wish to jump back to. I’ve got a full explanation of how to use cues and hot cues > HERE
Play/Pause Button
When you’re ready to begin playing a track hit the play button, press it again to pause the track.
Track Search
You can quickly scan through a track to get to the point you’d like to set cues by using the track search. You can sometimes speed this up by using the jog wheel.
Jog Wheel
The jog wheel is designed to imitate a vinyl record. You can touch it to stop a track, or hold and release to cue a track. You can turn it fast to create the spinback effect, and even scratch with it just like a vinyl record. Some jog wheels are touch sensitive and some require pressure to work.
Pitch Bend/Nudge
The ring around the edge of the jog wheels are not touch sensitive. These work separately to the rest of the jog wheel and let you momentarily change the pitch of a track. These are used to line up two tracks ready for mixing.
Pitch Slider
The pitch slider lets you change the tempo of the track, this will be used for manual beatmatching. Longer pitch sliders generally give finer adjustment and allow much easier beatmatching.
Performance Pads
Most controllers have a set of performance pads. These let you set hot cues as mentioned earlier, loops, drop samples, and add effects. Samples and effects will be assigned to each pad from inside the software.
Shift Button
The shift button controls the secondary functions of each button and can be found on most controllers. If you see another command written underneath a button in a different colour, this means the shift button activates it.
So you simply hold the shift button down while pressing the other button to activate the secondary function. For a more thorough explanation on this click > HERE
Stand alone and all-in-one mixing decks
Multi players and CD decks will have many of the same functions as DJ controllers, which we covered above. But to use stand alone players you won’t need a laptop. On most players you will find a built in screen which will show track info, waveforms, BPM, etc. This is the same for stand alone controllers (all-in-one units).
Some of these players will let you connect to a computer, but we’ll assume you’re not using one for this explanation.
I covered how to set up stand alone players in my MIXER ARTICLE. So if you need help setting up, go there first, otherwise you’re ready to load your first track.
Loading tracks into CD decks is very simple, you simply insert the CD and select your track using the track search function. To load tracks into multi players and all-in-one units you will need a USB drive containing your music library.
Insert the thumb drive into the USB port and your tracks will show on the digital screen. Tracks will then be chosen with the search and select buttons, and once selected you’ll see the track info. You’ll then be able to press play and use the cue/search buttons, jog wheels, etc as mentioned earlier.
Vinyl mixing decks
If you’re using turntables you’ll either need vinyl records, or a laptop to use them with a Digital Vinyl System. A DVS will let you play any track from your computer using just two encoded vinyl records. For more info on DVS check out > THIS ARTICLE.
Selecting tracks with a DVS will be done exactly like the drag and drop method mentioned in the controller explanation. Once the track is selected it will play through the encoded vinyl just like a traditional record.
When your tracks are playing and you’re ready to mix you’ll need to get a few things right. If you don’t your mixing will sound like a heard of elephants running at you. So check out my beginners mixing article > HERE. And for some top DJing tips check out -> THIS ARTICLE
You’ll also need to learn how to EQ a mix by going > HERE
And for a full explanation on using DJ headphones go here -> show me how.
These articles will get you mixing like a pro in no time! If you haven’t bought your mixing decks yet you can check out some of the best equipment available here…
Check out the TOP 10 beginner DJ controllers > HERE
Find the best mixers available for any budget > HERE
Check out my full review on the > Pioneer DDJ-RB
A full buyers guide to DJ headphones with the top choices > HERE
My full review on my current favourite controller > Pioneer DDJ-1000
And we put the top two DJ turntables head to head to see which one you should buy > HERE
I want to buy a stand-alone DJ controller which doesn’t require a laptop.
I don’t possess a PC only an iPad how would I be able to load tracks from this onto a USB stick then into this type controller??
Hi Jamie, you can get yourself an iPad USB stick which has the iPad connector on one side and a standard USB plug on the other, and then just drop your tracks into it just like you would with a PC. Most good stand-alone controllers will read AAC files (this is the format tracks you purchase at the iTunes Store are in) so just plug the stick into the controller as normal, and your tracks will show up. I hope this helps!